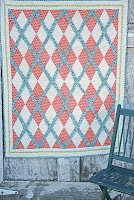
Friday, November 9, 2012

Inspiration Friday: Craft Rooms!

I am very lucky to have a whole room for sewing and other crafts.  The finished attic was definitely a selling point of our house.  We knew we wanted a "bonus room" where I could work on projects and not have to clean everything up at the end of the day.  It is really great being able to leave projects that are still in progress out on the cutting table or near the sewing machine.

There's only one big problem with the room... the window looking out over the backyard is old, rotten, and leaky.  We've known this since we moved into the house, but in Hurricane Sandy it realy became obvious that we need to fix it!  Granted, that was an extreme weather event, but seriously, the enter wall is soaked through. 

So, we are looking for a contractor to not only fix the structural issues with that wall and window, but also to replace the sheetrock and really finish off the space in a polished way.  Oh, and while we're up there, we're hoping to add new insulation under the roof and maybe even install some sort of cooling system so that it's actually possible to be up there during the HOT summers here!

I have already bought a few storage pieces that I love, and have some artwork in mind.  But it is always fun to dream about creating beautiful pieces in a beautiful new studio!

I love this streamlined and perfectly organized storage:


I know Ikea has cubbies like this (we had one in our old apartment).  I don't know if we could fit something like this up the steep staircase to our attic, but I have something similar that I think will work.... if only I can convince my husband to try getting it up there!

I thought this was a cool idea to put wallpaper or fabric behind the shelves to add some life:


And, although I'm not a big fan of shabby chic, the idea of putting beads and small embelishments into old salt and pepper and tiny other tiny glass containers is so sweet.  These are the kinds of things you always see at estate sales for a dollar because most people think they only need one set!


I also love the idea of having narrow shelves for artwork.  It is very clean, and makes it super easy to change out the pieces periodically.


Now, we just have to completely gut and redo our attic!

Tuesday, November 6, 2012

Anne's Fool-Proof Steak

I have a no-fail steak method that I love to use.  It is easy and works for all different kinds of cuts and thicknesses.  We used it this week on a wonderful locally grown new york strip steak (big enough to share!).

Here's the basic method:

- Season your steak and make sure it is room-temperature before cooking.  This is really important - don't skip this!
- Preheat your oven to 400.
- Heat a skillet on high heat.  When it is hot, add about a tablespoon of butter (more if needed for more steaks or a larger pan). 
- Sear both sides of your steak well.  This is the key to the whole process.  Once you put your steak down in the skillet, don't move it until you've gotten a good sear.  If you start flipping your steak around or moving it, you will not develop the tasty fond in your pan or get a proper sear on your meat.  One way to check if your meat is ready to turn is just to give it a little nudge with a pair of tongs.  If it moves easily, pick up a corner and check.  It should look like this:


- Sear on the second side, same as the first.
- Move the whole skillet into your preheated 400-degree oven.  Cook to desired doneness.  For this new york strip, which was nearly 2" thick, I cooked it for 6 minutes to medium rare.
- Let it rest!  A good rule of thumb is to let it rest for as many minutes as you cooked it.  Don't loose all the good juices you sealed in with the searing by cutting it too soon.
- You will have great flavors in your pan from the searing and cooking process, don't let them go to waste!  So, while the steak is resting, make your pan sauce - it can be as simple or complex as you like. 
(The basic process is: add whatever aromatics you want (onion, shallot, tomato paste), add a spash of wine and scrape up all the good bits from the pan, when the wine is mostly evaporated, add some stock and let it cook down to a sauce-y consistency.  Finish with a dab of butter.)

- Serve and enjoy!


Friday, November 2, 2012

Inspiration Friday: Chevrons!

My friend Elle over at elle-mental recently posted photos of a gorgeous chevron quilt she made out of a partial jelly roll.  It was amazing - the colors were perfectly cool and calming, and - even more amazing - she is donating it to the 100 Quilts for Kids project! 

I have loved the look of these quilts for a long time, and have amassed various inspirational photos in my "wish list" of quilts I would like to make.  Here are a few.

Some are true chevrons . . .


. . . while others are more of zig-zags . . .


But I think I am going to forge ahead using the tutorial on the Hyacinth blog:


I believe Elle's chevron quilt is based on this pattern (although I know from making countless quilts together that Elle never exactly follows someone else's pattern... there is always just enough math and geometry involved in quilting with her that I feel like I've had a real mental workout!).

Maybe if I can shake loose a couple of hours this weekend between multiple play dates, recovering from the week, getting ready for next week, and having our family portrait taken, I'll try to start one of these!

Happy quilting.

Wednesday, October 31, 2012

Whoooos One?!

I just finished this little owl quilt for a very special girl who is turning one today!  Happy Birthday Dessa!


I only bought a relatively small amount of fabric, thinking I would make one quilt, but decided that I would do one for Dessa and one for Aileen.  So I had to stretch my fabric more than expected.  I put together this sweet back with just a little bit of piecing:


 And finished it off with a label on my new(ish) Janome machine.


Now I just have to finish up the companion!

Friday, October 19, 2012

Inspiration Friday: Quiet Books

I have long wanted to make a "quiet book," and now I am thinking that I'd better get started!  I have done a lot of poking around on the internet to see what kinds of ideas other people have incorporated into the quiet books.  In my opinion, the best pages involve different levels of activities that kids can do at various developmental stages.  And some variety in the difficulty of tasks among the various pages is good too.  This is a video I first looked at probably over a year ago, and it is still one of the best that I've seen!


Now I just need to figure out how to execute the actual book once the pages are made.  Has anyone made a quiet book (or other cloth book) who has suggestions or would like to share their creations?

Friday, October 12, 2012

Inspiration Friday - Diamonds

Because the projects I want to work on far outnumber the time I have for quilting these days, I thought I would share some inspiration gathered from the blogosphere over the years.  Today's focus:  Diamonds!  I love the preppy playfulness of these quilts.  There are a few different formats shown here, but all showcase the bright colors of the main fabrics with negative space. 

Also, did you spot that the fabric in the lower right corner example is the same as used in our nursery?  I didn't until today.  I must be subconsciously drawn to this line!


(These are photos saved to my harddrive off of various blogs and website, so I don't have proper attribution information (sorry!).)

Wednesday, October 10, 2012

Make and Freeze Meals - Chicken and Rice with Mushrooms

It can be hard to know what to do or how to help when a loved one is sick or hurting.  One thing that can help is to make some meals that can be frozen and brought out and reheated when needed.  I still find this extremely helpful a year after having a baby, but it was critical to helping me eat nutritious meals to get back on my feet quickly in those first few days and weeks after the labor and delivery!

Here is one great make and freeze meal.  It is designed to be soft and easy to eat, without strong flavors.  But you could add flavor by including scallions with the sauted mushrooms, and poultry spices and curry when mixing the casserole together.  If texture is not an issue, you could also crumble Ritz crackers for the topping.

Chicken and Rice with Mushrooms:
Ingredients:
- 2 chicken breasts
- 2c white rice
- 2T butter
- 1 8oz package of sliced mushrooms
- Can of cream of mushroom soup
- 4oz tub of sour cream

- Poach the chicken breasts in boiling water.  When they are fully cooked, remove.  Allow to cool and then shred.
- Cook the rice according to the directions.
- Meanwhile, saute the mushrooms in butter.
- Add rice and chicken to sauted mushrooms.  Stir in can of soup and sour cream.  Add seasonings if desired.
- Transfer to a freezer and oven-safe container.  I think these from Hefty are great, because they can be tossed after the meal is eaten - no washing or storage of the pan.
- Cover with foil.  Freeze.
- To reheat, thaw in the fridge for a day.  Then cook in a 350-degree oven for an hour or until hot throughout.  Remember to put a post-it note with instructions on the top of the container so the recipient will know how to enjoy your meal!


Wednesday, October 3, 2012

Completed - Celtic Garden Quilt!

I actually finally finished this quilt a few months ago, but only have now gotten around to posting about it.  We've had a few things going on!  I love the way the quilt coordinates with the tulle canopy.  


 After we delivered this quilt, the walls were repainted a very faint lavender color, which looks beautiful.


I was so happy to finish this quilt - both because it was by far the biggest project I have ever taken on, but even more so because it was so warmly received.  I think this is my favorite thank-you card I have ever received:


It almost makes me want to continue making queen size quilts! . . . Almost.

Sunday, September 30, 2012

Homemade Finger Food


Now that our little sweet pea insists of feeding herself, we've been experimenting with different combinations of finger foods.  We have done all kinds of whole fruits and vegetables, cheese sticks, and crackers.  Now it's time to transition into more adult foods and flavors.  This recipe is healthy, tasty, and combines lean protein with vegetables.  (Remember to introduce foods individually to your baby to check for any allergies.)

photo.JPGIngredients:
- 2 T olive oil
- 1c shredded carrots
- 1c frozen peas
- 1c lentils (I like the tiny orange lentils)
- Seasonings of your choice (I use 1T McCormick Grill Mates, Monterrey Chicken seasoning mix)
-  2c water
- 1 egg
- 1/4c breadcrumbs + 1/4c whole milk


Directions:
- Heat the olive oil in a saucepan.  Add the carrots and peas, and saute until just starting to soften.
- Add lentils, water, and seasonings, and stir.  Cover and simmer until lentils are just cooked, about 10 minutes.
- Meanwhile, combine bread crumbs and milk in a small bowl, and whisk together.
- When the breadcrumbs have absorbed the milk, whisk in the egg.
- After the lentils are cooked, pulse with an immersion blender, pulse a couple of times to desired smoothness.
- When the lentil mixture has cooled slightly, add the egg mixture.  Stir. to combine.
- Spoon mixture into a mini muffin tin.  Cook at 350 degrees for about 20 minutes, until set.
- Cool and serve!


Wednesday, September 26, 2012

Reading Time

Best books for under-one-year-olds:
- Where's Spot (once babies start figuring out how to look under the flaps, it's great fun)
- Moo, Baa, La La La, Sandra Burton (fun for everyone, and has silly sounds for little ears)
- Goodnight Moon (there's a reason it's a classic!)
- The Very Hungry Caterpillar board book (it has little holes for tiny fingers)
- Pat the Bunny (our little Bug has completely torn hers apart, but it's only because she loves it!)


My dear friend Elle over at www.elle-mental.blogspot.com made this beautiful quilt for us out of the fabric I picked for the nursery.  A quick pillow cover and a cheap pillow insert from Joanne's completes our reading spot.  It is cozy for us to curl up on the quilt and read a few of our favorite books.